Thursday, July 19, 2012

Official Pinter*Mel Project #1 - DIY Flower Wall Art

The Inspiration: Pinterest - DIY Flower Wall Art

The Progress: 
We have a very lonely wall in our living room. 

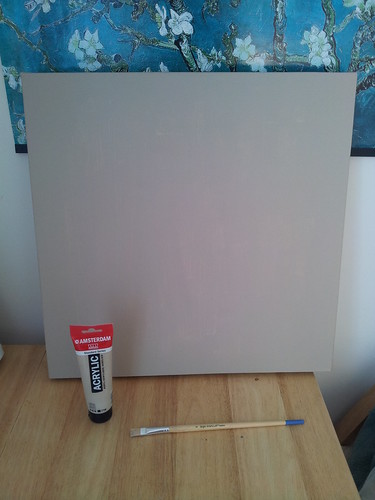
So, I purchased a 14x14 canvas from Wallack's, and proceeded to paint it a neutral beige colour using Amsterdam Acrylic Paint. 

Pro Tip: When painting your canvas you want to water down the paint a bit, otherwise you'll end up using the entire tube trying to get even coverage.  


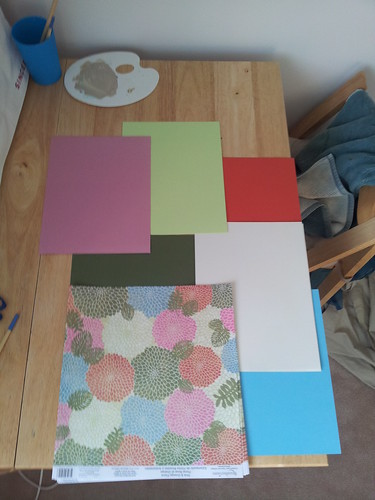
While your canvas is drying, you can start tracing your stencil onto the paper you have selected to use. 
Note: Please excuse the picture quality. I promise as this blog evolves that I will strive to take more centered and professional-like photos. 

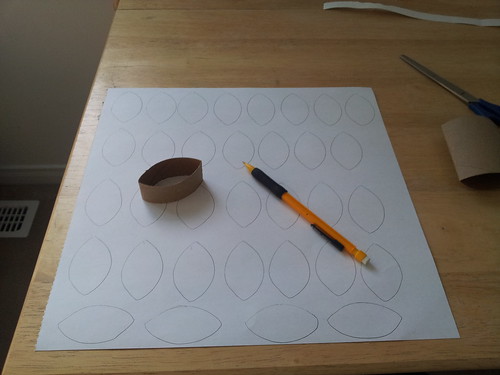
My ever-so high-tech stencil ended up being a piece of an empty toilet paper roll folded in half. It worked out perfectly! 

The the time-consuming part of the adventure began...

...and continued. 

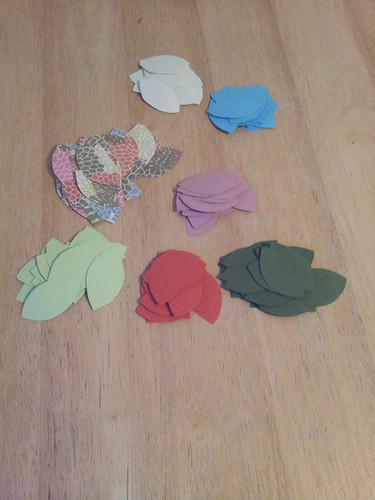
I believe when all was said and done I had cut out approximately 120 "petals". I had quite a few left over when I was finished, which I will use for another craft. 

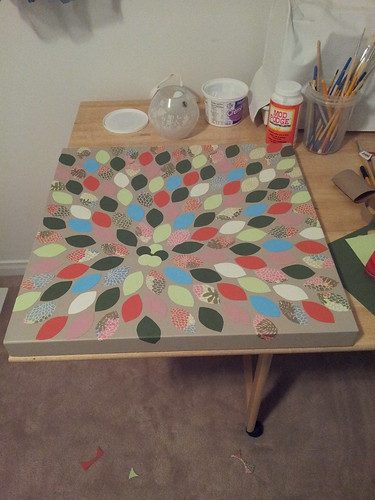
The important thing about this kind of craft is to lay it out before you start gluing it to the canvas. I'm a firm follower of the "measure twice, cut once" philosophy, and believe me, once you Mod Podge something to a surface, you want to make sure you have it in the right spot. 

Once you're satisfied with your design, the Mod Podging can begin! It's okay if some of the petals hang over the edge of the canvas. Once you're finished gluing all the petals onto the surface, you can turn your attention to those. Depending on your preference you can either cut them so they're flush to the edge of the canvas, or do what I did, which was fold them over the edge and glue them down. 

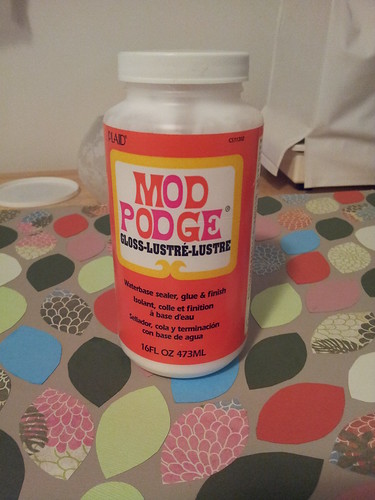
Once everything is glued down, I recommend going over the entire thing with a thin coat of Mod Podge. It will seal the paper and canvas, and will ensure that nothing ever comes peeling off, which is especially important if you live in a climate that's not friendly to paper-based crafts. I use Mod Podge's Gloss product. It's excellent for this kind of art. 

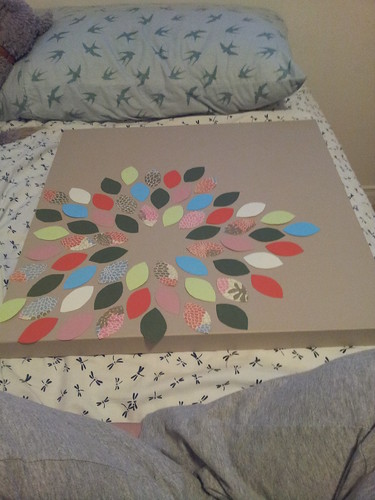
This shouldn't take long to dry, as long as you've applied only a thin layer that is. Once it's fully dry you're finished! Time to find a place to hang it! 


The Final Product: 
Now our living room wall is lonely no more! 

However, being the perpetual fuss-budget I am, and having a pile of left over petals, I plan on making some accent pieces for this wall. The plan is to use three or four 5x7 canvasses, using the same method in this post in order to make this wall a little more artfully balanced. 
I will update once I do this, with photos! 

Total Approximate Cost: Canvas $13, Paint $6, Paper $10, Mod Podge (used) $4. 

Have you done this project? Please post links to the outcomes in the comments section, or tweet me at @PinterMel


Update: I've added two smaller canvasses to even the wall out. 


Melissa 


Wednesday, July 11, 2012

Stuff I've Already Done - The Christmas 2011 Redux

In October of last year I gave myself a challenge: MAKE ALL THE PRESENTS YOU'LL GIVE FOR CHRISTMAS THIS YEAR. 
Here's a sampling of some of the gifts I made for Christmas 2011. 

For Brother & Sister-in-Law - Glass Bowls with Etched Family Name

In Progress:   

The Final Product: 

Note: The glass etching cream is incredibly corrosive to skin, so this is DEFINITELY NOT a craft for children, and should only be done with gloves and a mask (and if you have safety goggles). Seriously, it's that dangerous. 


For Mom - Button-Monogrammed Pillow
The Inspiration:  Pinterest - Button Monogrammed Pillow & My Mom gave me her button collection and told me to "do something crafty with it". 


In Progress:  


The Final Product: 


Note: This project was WAAAAAY more time consuming than I had anticipated. It took me about a week (about 1-2 hours an evening) to complete. Also, don't do this project without a thimble, your thumb will thank you. 


For Godson & Nephew - Washer-Monogrammed Truck Wall Art


In Progress: 


The Final Product: 

Note: Four simple steps - 1. Paint canvas preferred colour. 2. Use stencil and Sharpie paint markers to draw truck art. 3. Stick washers on with Mod Podge. 4. (Optional) Go over the entire piece with Mod Podge. 
I definitely recommend getting the Sharpie Oil-Based Paint Marker for the truck stenciling. It's so much easier than buying all the paints separately and then brush painting the stencils onto the canvas. 


For My 2 Aunts - Repurposed Cigar Boxes
The Inspiration: This wasn't a Pinterest inspiration, but something that came completely out of my own brain. 

In Progress: 


The Final Product: Unfortunately I neglected to take a picture of the final product, although what you see above it pretty much it, with the exception of felt being added to the inside of the bottom of the box. 

Note: Ensure you wash out the box thoroughly (mine had dead pieces of cigar still left inside) and air them out. Because the two boxes I repurposed had until recently be used for their original purpose, once the boxes were dry they still smelled. So I placed some vanilla soy candle beads in the boxes and closed them up for a week before I started work on them. This cleared up any lingering cigar smell, and added a nice fragrance. 
Once you have finished Mod Podging your design onto the box wait until it's dried and then go over the entire thing with Mod Podge. I think I did two coats on both the inside and the outside. It seals up the wood, and gives it a nice sheen. 

Stocking Stuffers: Part One - Terra Cotta Drink Coasters

(Sorry, no "In Progress" shots.)

The Final Product: 


Note: While these were super cheap to make, they were kind of a pain in the ass to make in the wintertime. Firstly, the terra cotta bases are spray painted (I recommend the Krylon line), which you have to do outside (brrrrr! However if you're lucky enough to have a garage, do it there!), secondly spray paint doesn't a) dry quickly when it's cold, nor b) dry quickly when there's humidity (think snow). So these took FOREVER to dry completely. 
Once they were dry, I Mod Podged the paper centres onto them, and then brushed the entire inner surface with Mod Podge, then let them dry. 
Here comes the super smelly and annoying part of the entire process - the clear coat. Sure, I probably could have just put a few coats of Mod Podge on them and they would have been passably water sealed. However, seeing as they were gifts, I wanted to make sure they were properly sealed. I'm fairly certain I put on 2 coats of the Krylon Low-Odor Clear Finish. (Make sure to do this part outside too, although it indicates low-odor, trust me, it really isn't.) The Krylon water seals the paint, and gives them a nice shine. 
I set these aside to dry for about two days, and then I glued felt to the bottom to ensure they didn't scratch the tables on which they would eventually be used. 

Note 2: I've also made these coasters, and while they are easier to make, I definitely like the terra cotta ones better. They're better at preventing Clumsy*Mel from spilling her drink. 


Stocking Stuffers: Part Two - Etched Perrier Bottles & Cutesy Pins
The Inspiration: The Etched Perrier Bottles came from the etched casserole dish inspiration referenced at the beginning of this post. The cutesy pins were just something I thought up in effort to use up some pin fasteners I had laying about. 

In Progress: 
Yes, they're Big Bang Theory themed. ;)

The Final Product: 

and the pins - 

Note: To jazz up the bottles for the folks I was giving them to, I purchased a few sprays of faux long-grass to place in the bottles, it worked really well. 
The pins are comprised of felted scrapbooking accents (look up "felt stickers" on the Michael's website) with pin back findings heavily glued to the back. That's it. 


So there you have it! A sampling of the crafts I did for Christmas last year! They were all relatively easy, definitely cheap, and very well liked by the recipients. 
This year I endeavour to start looking for inspiration earlier; truth be told I've already started pinning DIY ideas. I can't wait! 

Have you starting thinking about about your crafty plans for this year's holiday season? Come on, I can't be the only one! ;)

Cheers, 

Melissa

Welcome!

In effort to reinvigorate my inner craftiness I have decided to start blogging about the craft ideas I find on Pinterest and my adventure in trying to replicate them. 
I'm sure some of us have browsed around Pinterest and have found crafts that look super simple, only to turn out to be epic fails, or at the very least WAY more involved than it looked. 


I endeavour to pick crafts that would make excellent gifts, beautiful (yet simple!) home decor, and hopefully this year I will finally learn how to use my sewing machine and begin to venture into making clothing and accessories. 


Last Christmas I made every present I was required to give based on craft ideas found on Pinterest, and this Christmas will be no different. Also, August is a busy birthday month for my family, in addition to my brother's wedding which will take place in September, and I have decided that everyone will receive personalized handmade gifts from yours truly. 


So with August rapidly approaching, it's time to get this party started! LET'S GO!!!